Benutzer-Werkzeuge
Inhaltsverzeichnis
9k6 Transceiver with Yaesu FT-8500
Introduction
What is needed for the usage of a 9k6 transceiver
- Yaesu FT-8500
- Raspberry Pi (no matter what model, How-To is based on a RPi 3B+)
- A RJ45 LAN Cable
- A miniDIN 6pin Plug
- A 3.5mm stereo plug
- Adapter PCB (by HB9GSL)
Besides the FT-8500 every other 9k6 capable radio can also be used.
Connections
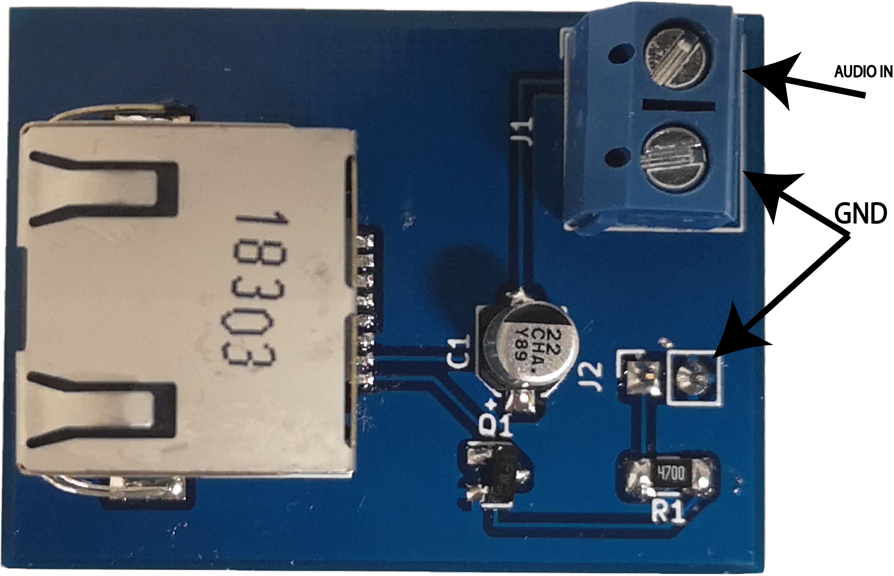
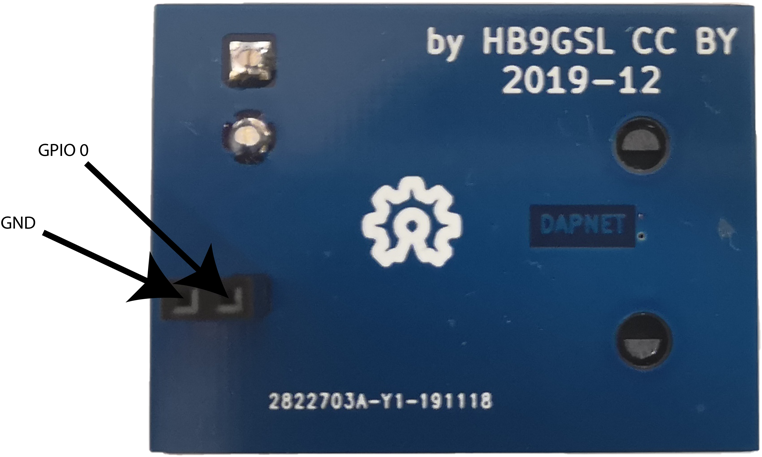
To make connections a little easier a adapter PCB is available (assembled except for the pin header). The PCB is available from hb9gsl@uska.ch for the price of shipping (limited quantities). For amateur radio participants who want to make the boards themselves the gerber files are available as well as the BOM. PCBs can be manufactured by JLCPCB (good experiences). All needed compontents are available at LCSC. This PCB can be used for all 9k6 transmitters that are based on UniPager.
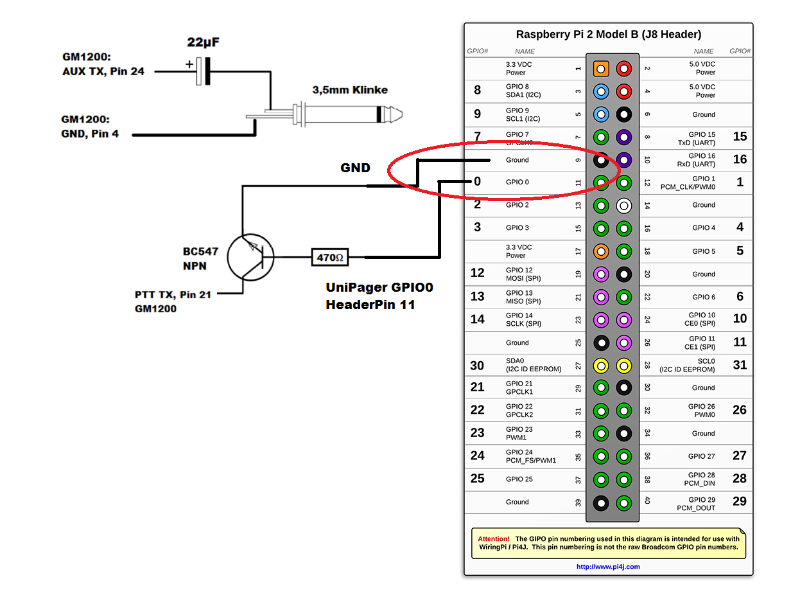
On the PCB only the audio signal needs to be connected and the PCB plugged onto the PGIO port of the Raspberry. See photos:
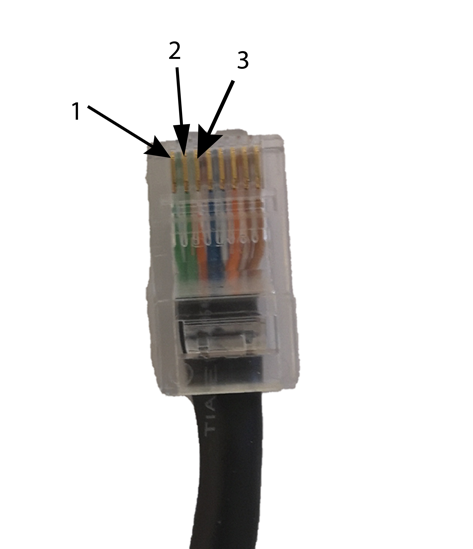
An old used ethernet cable can be used to connect the PCB to the transmitter. One off the RJ45 plugs is to be cut off and replaced by the miniDIN connector. The left most 3 pins of the RJ45 connector are used (see photo). In this case the wires have the colors green/white, green and orange/white. In case you are unsure use an ohm-meter to determine pin numbers.
- Pin 1 is the PTT wire (pulled to GND in case of transmission)
- Pin 2 is the audio signal
- Pin 3 is GND
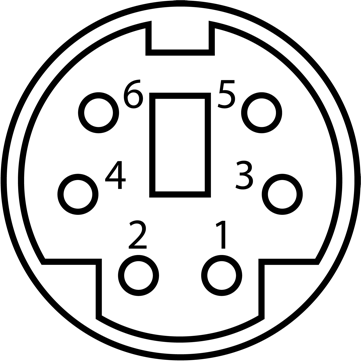
These wires need to be connected to the FT-8500 as follows. The image shows the jack (female connector) of the FT-8500.
Connections for the FT-8500
- RJ45 pin 1 to miniDIN pin 3
- RJ45 pin 2 to miniDIN pin 1
- RJ45 pin 3 to miniDIN pin 2
UniPager Configuration
For installation see UniPager.
Settings for the FT-8500:
- Set alsamixer output to 100%
- Audio level in UniPager set to 56 and tick checkbox „inverted“
- PTT GPIO pin 0 (not inverted)

