Benutzer-Werkzeuge
Dies ist eine alte Version des Dokuments!
Inhaltsverzeichnis
Nextion Touch Display for UniPager
Every project nowadays reaches for nice user interface. The display models from the company Nextion are quite famous due to their price and capabilities. The connection is made by a 3.3 V UART interface, either by a USB-TTL 3.3 V adapter or via the RasPi's onboard UART, if not already used. The software is written in Pyhton can can be found here. https://github.com/rwth-afu/UniPagerNextion
Start-Animation of the Displays:

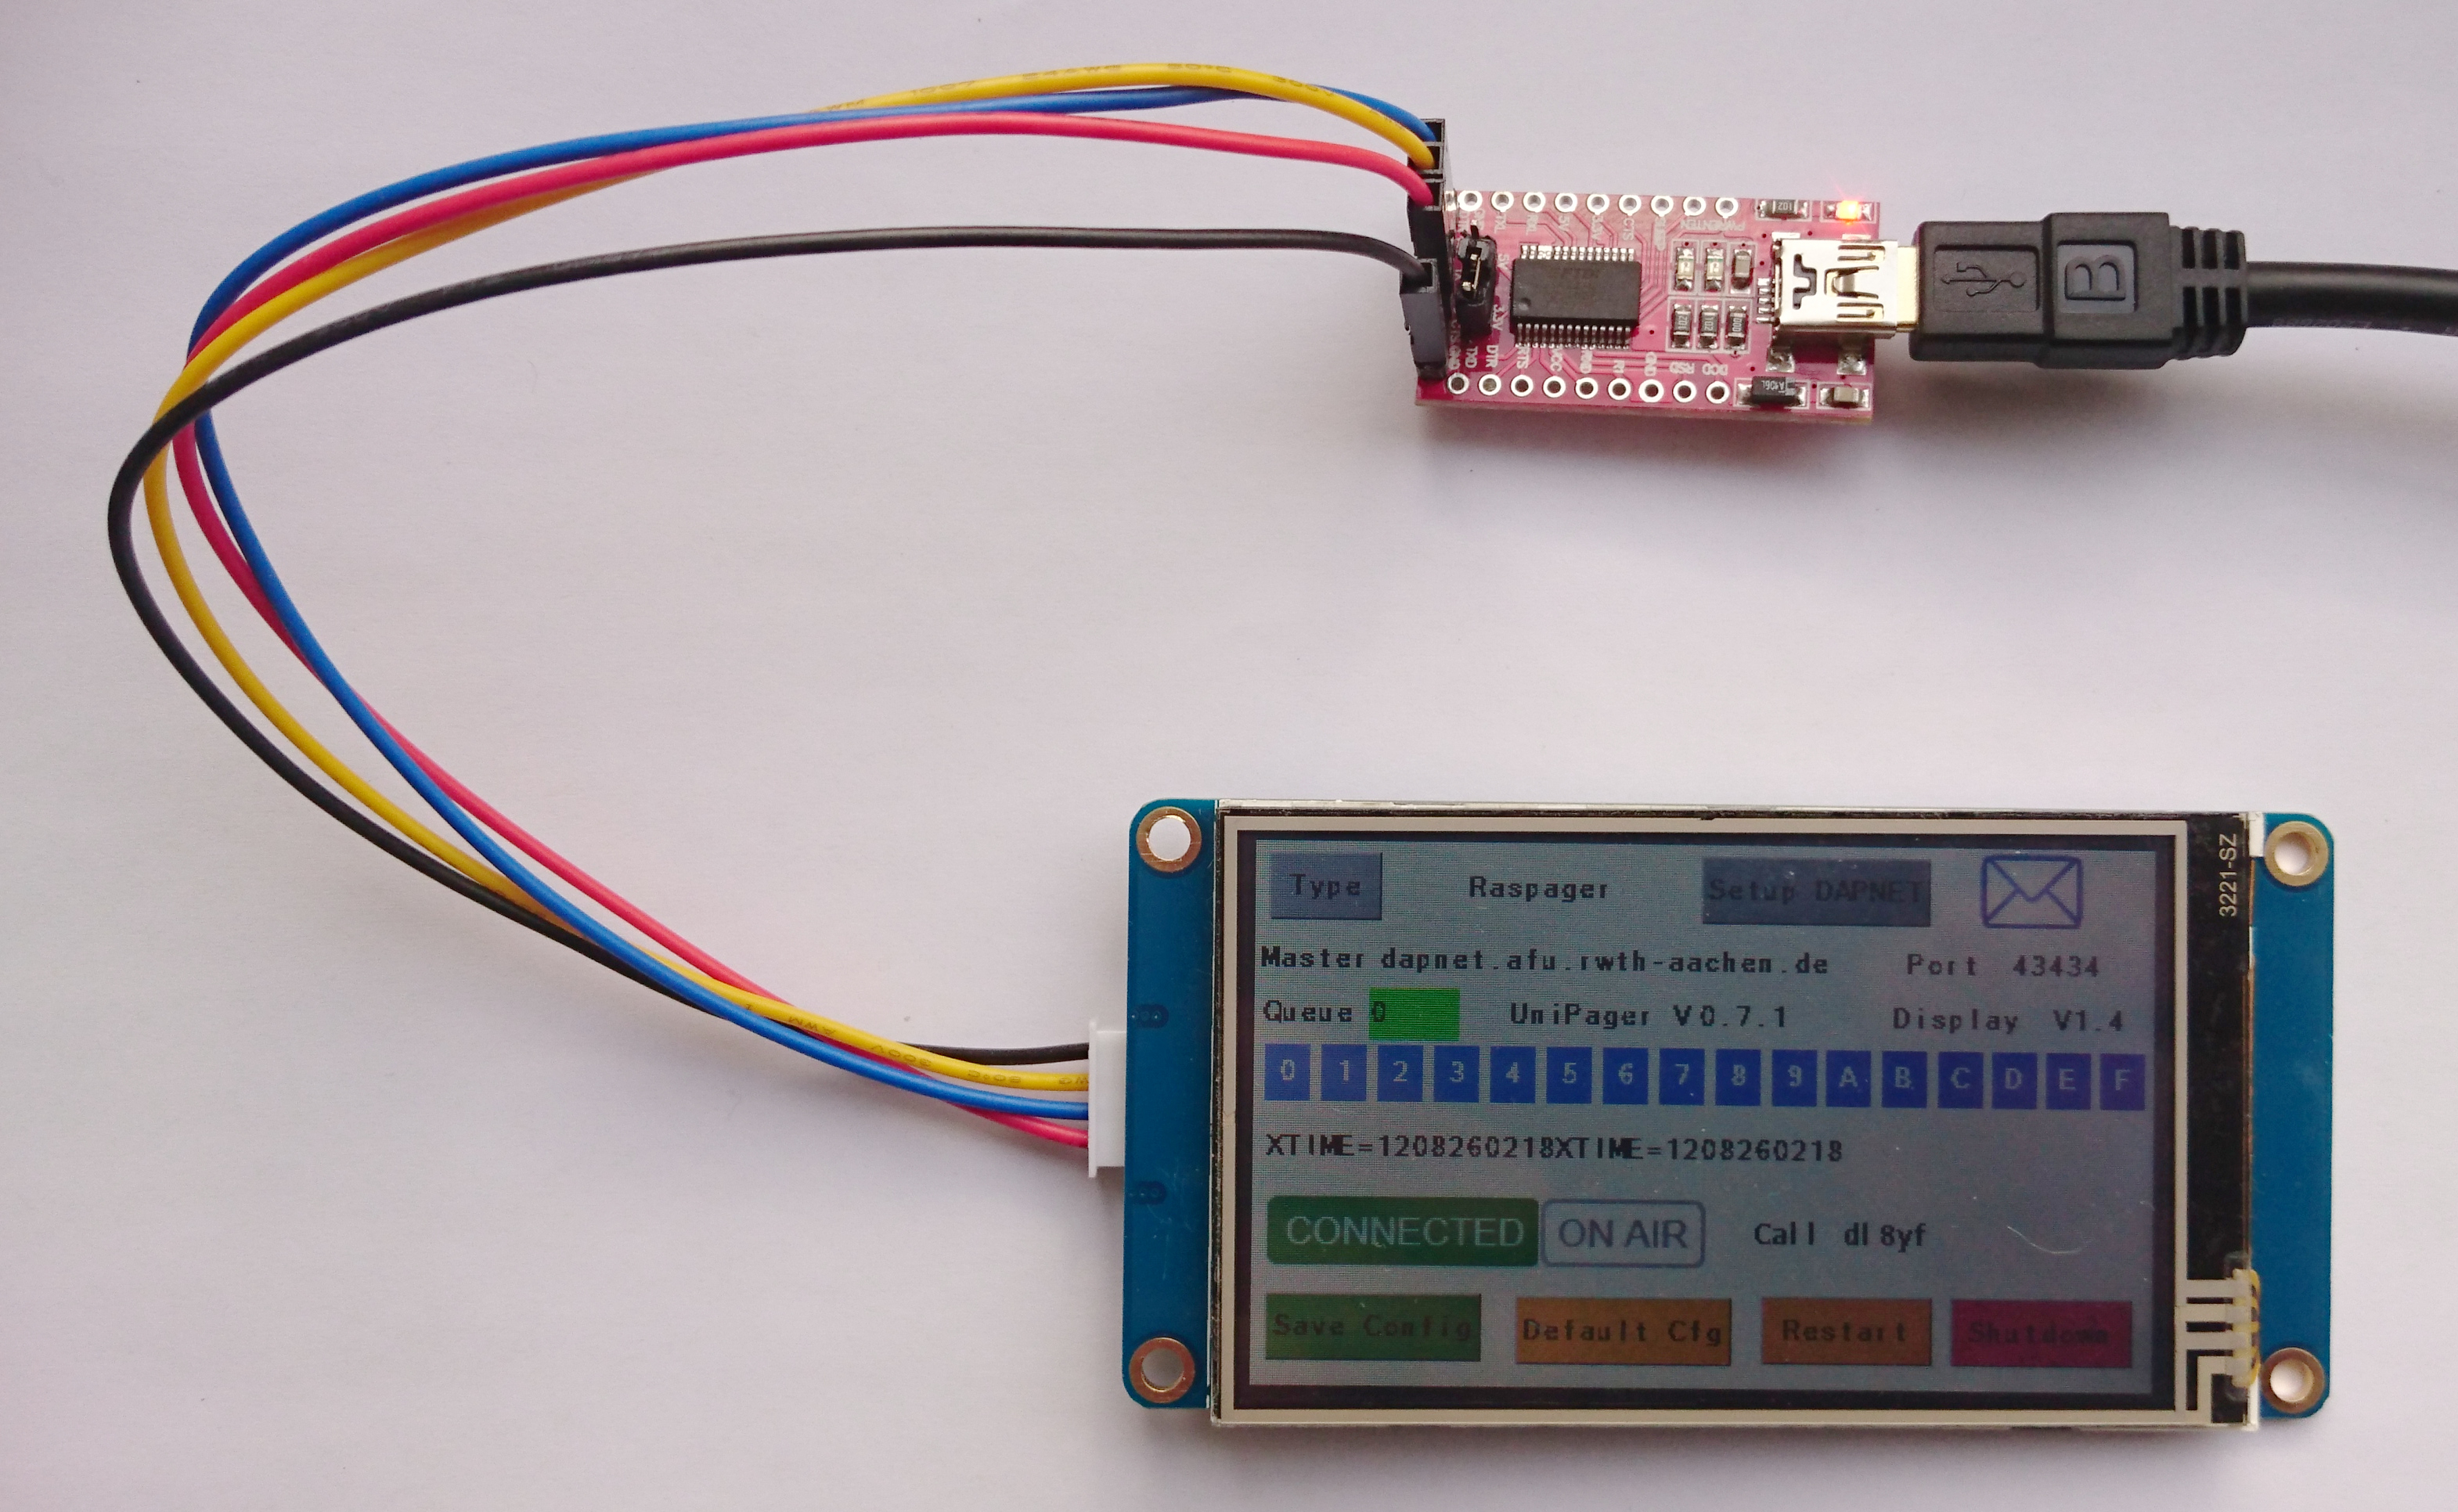
View from running mode:

View in 19 inch frame:

Supported Display types
In general, all display types from nextion are supported, but it is recommended to use as minimum the 3,2 inch version in order to have sufficient space on the display. The type code is NX4024T032 Link to the manufacturer. There is also a version with 4.2 inch available.
Be aware: The updates of Unipager may not always be compatible with the UniPagerNextion software. If something is not working after an update, let us know and write a ticket to
support at hampager.de
or open a ticket directly.
Installation
Overview
The working principle of this display control is devided in two parts:
- On the Nextion Display a special software is running to display the graphics and interact via a UART interface with the host running Unipager.
- On the host with Unipager, a Pyhton script is connecting via the websocket interface to Unipager. This makes it possible to get the status and config data from Unipager as well as sending the configuration manipulated on the touch screen display towards the Unipager.
Preparation
Install unipager as described on the Unipager section of this wiki.
Install git with
sudo apt-get install git
Software download and install
Clone the github repository containing all the software needed into a temporary directory, e.g. /home/pi
git clone https://github.com/rwth-afu/UniPagerNextion.git
cd into the directory of the install script and run it:
cd UniPagerNextion/src
sudo bash ./install.sh
This will install the python script to /usr/local/bin/unipagernextion.py and install a systemd service file named /usr/local/lib/systemd/system/unipagernextion.service. It will also register this service.
Now edit the config file in /etc/unipagernextionconfig.py according to your needs:
sudo nano /etc/unipagernextionconfig.py
# The config is just a python script which will be included

# The hostname, default localhost
#hostname = "localhost"

# The port, default 8055
#port = 8055

# Serial Port to the Nextion Display, default "/dev/ttyUSB0"
#serialport = "/dev/ttyUSB0"

# Serial Seppd to the Nextion Display, default 115200
#serialspeed = 115200
In the general case, no adaption is needed.
 As we have learned, not everybody is familiar with the concept of commenting-in und out Read more. So to be extremly clear here:
# Something means that Something is IS NOT active
Something means that Something IS active
Keep in mind to restart the UnipagerNextion service after altering the config file.
Hardware connection of the Nextion display
There are two ways of connection the Nextion display to the Raspberry Pi.
Direct connection to GPIO UART
If you do not use the Raspager or RaspagerC9000, the GPIO is free to use. So you can conntect the four cables from the Nextion directly to the GPIO header.

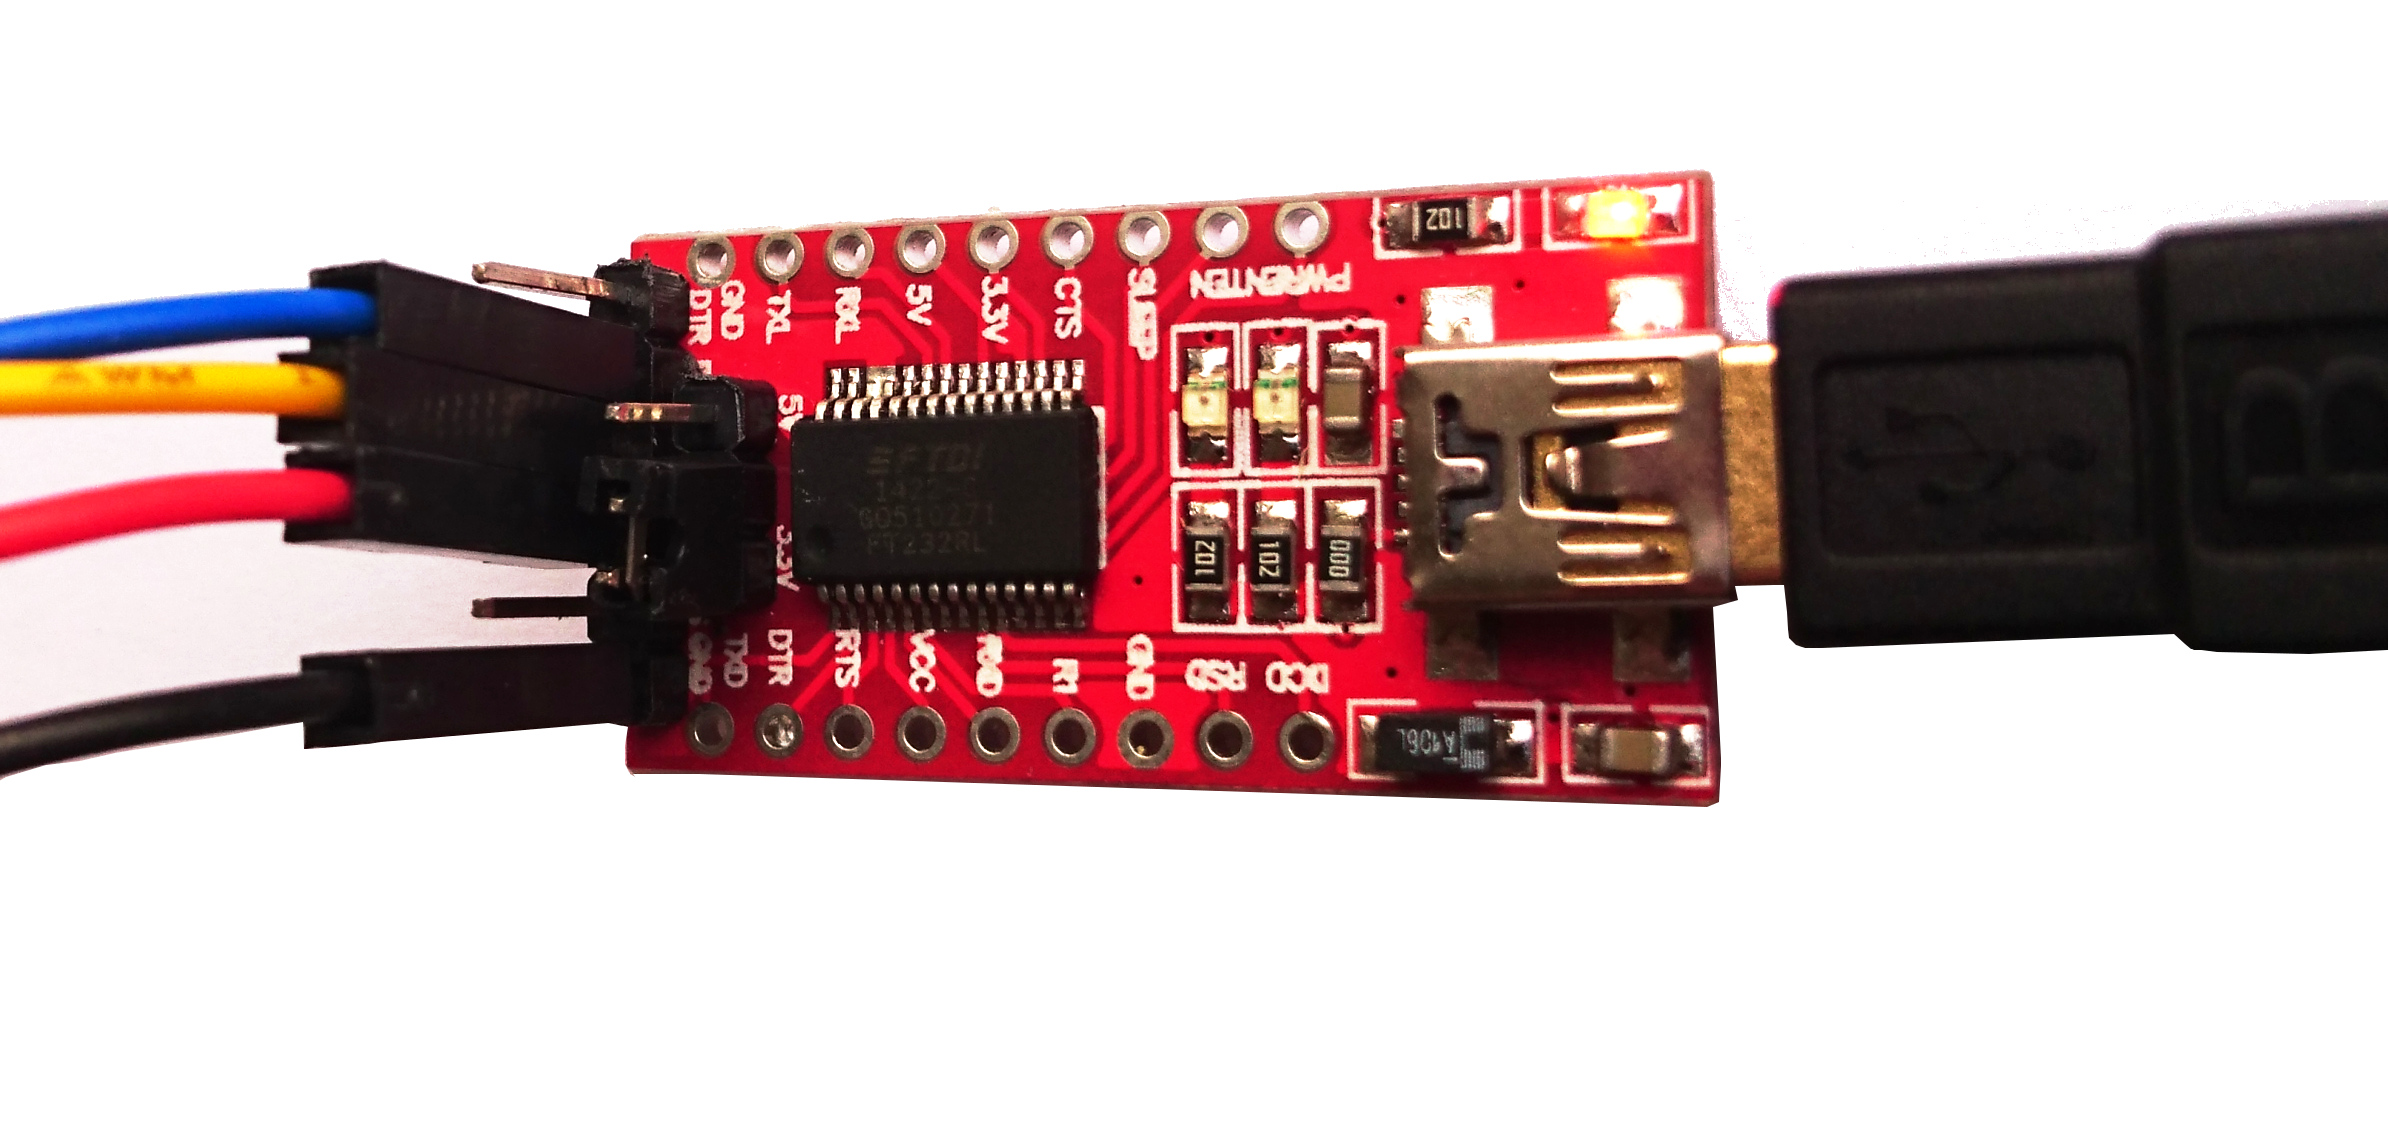
Connect via USB2Serial-Adapter
In case the onboard UART is not available, you can use a USB-to-Serial adapter.
Loading the software on the Nextion display
There is a python script at https://github.com/rwth-afu/UniPagerNextion/tree/master/src. Edit the COM-Port according to your connection and run it with the .tft file. For firmware update of the display itself a programming with the Windows software from Nextion is recommended.
Seiten-Werkzeuge
